
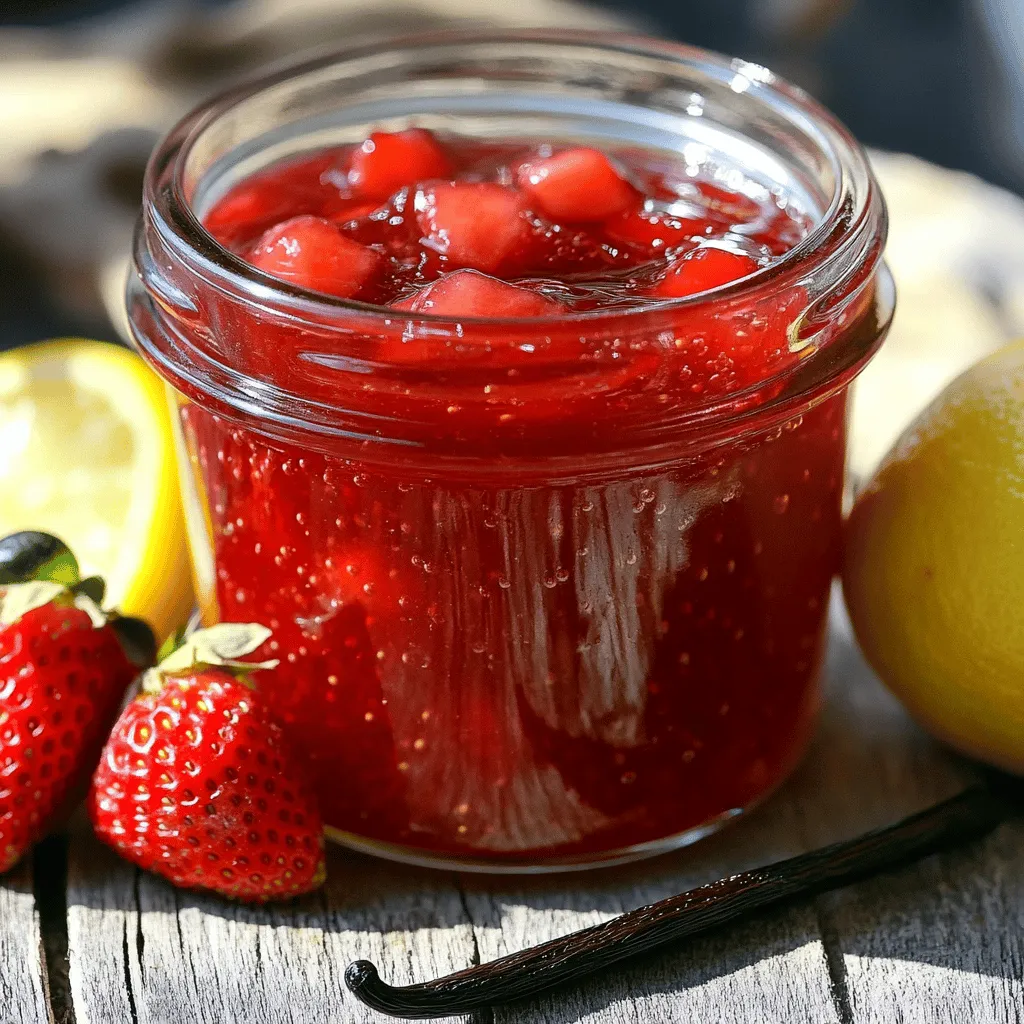
Homemade Strawberry Jam Delightful and Easy Recipe

Are you ready to make delicious homemade strawberry jam? This easy recipe will delight your taste buds, filling your kitchen with the sweet aroma of fresh strawberries. With just a few simple ingredients and straightforward steps, you can achieve the perfect jam consistency. Whether you enjoy it on toast or as a topping for desserts, your homemade jam will impress everyone. Let’s dive into the joy of making strawberry jam together!
Ingredients
List of Ingredients
– 2 pounds fresh strawberries, hulled and diced
– 1 ½ cups granulated sugar
– 1 tablespoon freshly squeezed lemon juice
– 1 teaspoon pure vanilla extract
– 1 packet (1.75 oz) fruit pectin (like Sure-Jell)
– ¼ teaspoon fine sea salt
Tips for Selecting Fresh Strawberries
When you pick strawberries, look for bright red color and firm texture. These signs show they are ripe and sweet. Avoid strawberries with blemishes or soft spots, as they may spoil quickly. Fresh strawberries make the best jam.
Measuring Ingredients Accurately
Using accurate measurements is key for great jam. I recommend using kitchen scales for precise results. When measuring dry ingredients, use a spoon to scoop them into your measuring cup. Then level them off with a straight edge. This method ensures you don’t pack the ingredients, which can lead to errors in your recipe.
Step-by-Step Instructions
Preparing the Strawberries
1. First, take 2 pounds of fresh strawberries. Make sure they are hulled and diced.
2. In a large mixing bowl, combine the strawberries and 1 ½ cups of granulated sugar.
3. Gently stir the mixture to coat the strawberries.
4. Let it rest for about 30 minutes. This time helps the strawberries release their juices.
Cooking the Jam
1. After resting, transfer the strawberry-sugar mixture into a large, heavy-bottomed pot.
2. Add 1 tablespoon of freshly squeezed lemon juice, ¼ teaspoon of fine sea salt, and 1 packet (1.75 oz) of fruit pectin.
3. Stir thoroughly to mix all the ingredients well.
4. Set the pot over medium heat. Bring the mixture to a gentle boil, stirring often.
5. Once it boils, lower the heat slightly and let it simmer for about 10 minutes. Keep stirring frequently to avoid sticking.
6. As the jam cooks, foam may form on top. Use a ladle or spoon to skim off the foam. This step keeps your jam clear and smooth.
Testing for Doneness
1. To test if the jam is ready, place a spoonful on a cool plate.
2. Let it sit for a minute. Run your finger through the jam. If the path stays and doesn’t run back together, it’s done!
3. If the jam isn’t thick enough, boil it for 2-3 more minutes and repeat the spoon test.
4. Once it reaches the right consistency, remove the pot from heat. Stir in 1 teaspoon of pure vanilla extract for extra flavor.
Now you’re ready to pour your hot jam into sterilized jars! For the full recipe and additional tips, check out the full recipe section.
Tips & Tricks
Achieving the Perfect Jam Consistency
To get your jam just right, avoid common thickening mistakes. First, don’t skip the pectin. It’s key for thickening. If your jam seems too runny after boiling, you may need more pectin. Add it in during the cooking phase. Always check the jam’s consistency with the spoon test. If it runs, keep cooking.
Flavor Variations
Try adding herbs like basil or mint for a fresh twist. These herbs bring a new layer of flavor to your jam. You can also experiment with citrus zests. Lemon or orange zest brightens the jam and adds a delightful zing. This makes your jam unique and exciting.
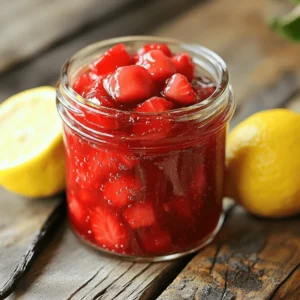
Presentation and Serving Suggestions
When it comes to jars, get creative! Use cute tags to label your jam. Include the date and a fun serving suggestion. For serving, homemade strawberry jam pairs well with fresh scones or toast. You can also use it as a topping for yogurt or ice cream. It adds a burst of flavor to simple treats.
For the full recipe, check out the Sweet Summer Strawberry Bliss Jam.
Variations
Low-Sugar Strawberry Jam
You can enjoy strawberry jam with less sugar. To make low-sugar jam, you can reduce sugar by about half. Use ¾ cup sugar for 2 pounds of strawberries. This change may alter the jam’s taste and texture slightly. Instead of sugar, you can try sweeteners like honey, agave syrup, or stevia. These options can help cut calories while keeping the jam sweet.
Strawberry-Rhubarb Jam
For a tangy twist, you can add rhubarb to your jam. Combine 1 cup of diced rhubarb with 2 pounds of strawberries. This mix creates a lovely balance of sweet and tart. Adjust cooking time to around 15 minutes to ensure both fruits cook down well. The rhubarb breaks down quickly, so stir often to avoid burning.
Strawberry Jam with Chia Seeds
Chia seeds are a great option for thickening your jam. Add about ¼ cup of chia seeds to the basic recipe. They will soak up liquid and create a nice gel-like texture. Chia seeds also come with health benefits, like omega-3 fatty acids and fiber. This option makes the jam nutritious and delicious. You can enjoy your jam spread on toast or mixed into yogurt.
For the full recipe, click here to explore all the steps!
Storage Info
Proper Jam Storage Techniques
To keep your homemade strawberry jam fresh, start with clean, sterilized jars. Here’s how to do it:
– Wash jars in hot, soapy water.
– Rinse them well and place them in a pot of boiling water for 10 minutes.
– Let jars cool on a clean towel.
For jar lids, boil them for a few minutes too. This kills germs.
When storing jam, keep unopened jars in a cool, dark place. Opened jars go in the fridge. Always seal jars tightly after each use.
Shelf Life and Quality Timing
Homemade jam can last up to a year if stored properly. However, once opened, use it within three weeks.
Look for these signs that your jam might have gone bad:
– Mold on the surface.
– Unpleasant smell.
– Change in color or texture.
If you notice these signs, it’s best to throw the jam away.
Freezing Strawberry Jam
Freezing is a great option if you have extra jam. To freeze it without losing flavor:
– Use freezer-safe containers or jars.
– Leave space at the top of containers for expansion.
When you’re ready to enjoy your jam, thaw it in the fridge. This keeps the flavor fresh.
Using these storage tips ensures your homemade strawberry jam stays delicious for longer! For the full recipe, check out the Sweet Summer Strawberry Bliss Jam.
FAQs
Can I use frozen strawberries for this jam recipe?
Yes, you can use frozen strawberries. Start by thawing them in a bowl. Drain any excess liquid. Then, mash the strawberries gently before mixing them with sugar. This helps release their juices, just like fresh berries do.
What can I substitute for vanilla extract?
If you don’t have vanilla extract, use almond extract for a nutty flavor. You can also try maple syrup or even a splash of orange juice. Each option adds a unique twist to your jam.
Is it safe to water-bath can my homemade strawberry jam?
Yes, it is safe to water-bath can your jam. Use clean, sterilized jars and lids. Fill the jars with hot jam, leaving some space at the top. Process the jars in boiling water for about 10-15 minutes. This keeps your jam safe for a long time.
How to fix runny strawberry jam?
Runny jam can happen for a few reasons. You may not have cooked it long enough or used too little pectin. To fix it, return the jam to the pot. Boil it again and add more pectin. Stir well and test for thickness.
Making strawberry jam at home is fun and rewarding. You learned about the key ingredients, like fresh strawberries and pectin. I shared tips for choosing ripe berries and measuring accurately to ensure success.
You now know how to cook your jam and test its thickness. I also included variations and storage methods to keep your jam fresh. Enjoy creating your perfect jam and sharing it with friends!


![- 1 cup all-purpose flour - 1/2 cup granulated sugar (for batter) - 1 tablespoon baking powder - 1/2 teaspoon salt - 1/2 teaspoon ground cinnamon (for batter) - 1/2 cup milk - 1 large egg - 2 tablespoons unsalted butter, melted - 1/4 cup granulated sugar (for coating) - 1 teaspoon ground cinnamon (for coating) Gathering your ingredients is the first step to making these easy cinnamon sugar donuts. Each item plays a key role in creating that light and fluffy texture we all love. The all-purpose flour gives structure, while the baking powder helps them rise. The sugar not only sweetens but also adds to that lovely caramelization that happens when you bake them. The milk and egg bring moisture and richness, making your donuts soft. Butter gives a nice flavor and helps with browning. For the coating, cinnamon and sugar combine for that classic taste we crave. - Donut pan - Mixing bowls - Whisk - Spatula or wooden spoon - Piping bag or spoon You will need a few tools to make this process easy. A donut pan is crucial for shaping your treats. Mixing bowls help you combine your dry and wet ingredients. A whisk is great for blending, and a spatula or wooden spoon will help you fold the batter gently. If you don’t have a piping bag, a spoon works just fine too! With all these ingredients and tools ready, you're set to make some delightful cinnamon sugar donuts. Check out the Full Recipe for all the steps you need to follow! - Preheat the oven to 350°F (175°C). - Grease the donut pan with butter or cooking spray. - In a large bowl, combine the dry ingredients: - 1 cup all-purpose flour - 1/2 cup granulated sugar (for batter) - 1 tablespoon baking powder - 1/2 teaspoon salt - 1/2 teaspoon ground cinnamon (for batter) - In a separate medium bowl, whisk together the wet ingredients: - 1/2 cup milk - 1 large egg - 2 tablespoons unsalted butter, melted - Pour the wet mixture into the dry ingredients. Stir gently until just combined. - Fill each cavity of the donut pan about two-thirds full with the batter. - Bake for 10-12 minutes until golden brown. A toothpick should come out clean. - While the donuts bake, mix the cinnamon sugar: - 1/4 cup granulated sugar (for coating) - 1 teaspoon ground cinnamon (for coating) - After baking, cool the donuts in the pan for about 5 minutes. - Then, transfer them to a wire rack to cool completely. - Roll each warm donut in the cinnamon sugar. Coat them well for the best flavor. Now, your easy cinnamon sugar donuts are ready to enjoy! Check out the Full Recipe for more details. To make soft and fluffy donuts, avoid overmixing the batter. Mix just until combined. Lumps in the batter are okay. Using fresh ingredients also makes a big difference. Fresh flour and baking powder give the best rise and flavor. You can experiment with different spices. Nutmeg adds warmth and depth. Adding a splash of vanilla extract makes the donuts richer. This small change can elevate the taste. Serving your donuts on decorative plates makes them more inviting. A simple touch can impress your guests. For a pop of color, garnish with fresh mint leaves. This adds a nice contrast to the warm, sugary donuts. {{image_4}} You can change the topping for your donuts. Use powdered sugar instead of cinnamon sugar. This gives a sweet, light touch. If you want to try something different, a chocolate glaze works well. Melt some chocolate and dip the donuts in it. This adds a rich and sweet flavor. You can also mix up the donut flavors. Try adding pumpkin spice for a fall treat. This gives a warm and cozy taste. For a refreshing twist, add lemon zest. It brightens the flavor and adds a nice zing to each bite. If you need gluten-free donuts, don’t worry. You can use gluten-free flour blends. Just make sure to check the package for the right amount. You may need to adjust baking times. Keep an eye on them to ensure they bake perfectly. For the full recipe, feel free to check back and create your own easy cinnamon sugar donuts! Store your donuts in an airtight container. They stay fresh at room temperature for up to 2 days. Keep them away from heat and moisture to avoid sogginess. You can freeze these donuts for up to 3 months. To freeze, place them in a single layer on a baking sheet. Once frozen, transfer them to a freezer bag or container. Thaw at room temperature before serving. This will help them taste fresh again. To enjoy your donuts warm, revive them in the oven. Preheat your oven to 350°F. Heat the donuts for 5-7 minutes. This method keeps them soft and tasty. Enjoy your cinnamon sugar donuts just like they were fresh out of the oven! Check the [Full Recipe] for more details. Yes, but it may alter the texture slightly. Whole wheat flour is denser. You might find your donuts a bit heavier and less fluffy. If you want a lighter donut, stick with all-purpose flour. Ensure your baking powder is fresh and don't overmix the batter. Overmixing can lead to dense donuts. Mix just until combined for a nice, airy texture. Trust me; a little lumpiness is okay! Yes, you can, but adjust the baking time accordingly. Muffin tins may take a bit longer. Start checking for doneness around 12 minutes. Use a toothpick to check if they are done. The total time is approximately 20 minutes including preparation and baking. It's a quick treat! You can have warm donuts ready in no time, making them great for sudden cravings. Perfect for breakfast, brunch, or as a delightful snack with coffee or tea. These donuts bring a warm joy to any gathering. They also make kids smile at snack time! To sum it up, we covered how to make delicious baked donuts from scratch. You learned about the ingredients and equipment needed. We walked through the steps from mixing to baking and coating. Remember to play with flavors and coatings to make these donuts your own. Store them well for future enjoyment. Enjoy your time in the kitchen and share these treats with friends and family. Happy baking!](https://lushplate.com/wp-content/uploads/2025/06/29d23c8c-a21f-4e61-a0af-ccbcac99f648-768x768.webp)